I thought I’d try to give you a description of how I cobbled this little lovely together…it’s become one of my favourites already!
I cheated and got the yoyo’s (or Suffolk Puffs) from eBay – they’re vintage 1940’s apparantly – but to make a yoyo is so easy even I do it look . You cut a circle of fabric, do a running stitch around the circumference and then pull tight, fasten off and squash it flat. Or iron it if you’re very good.
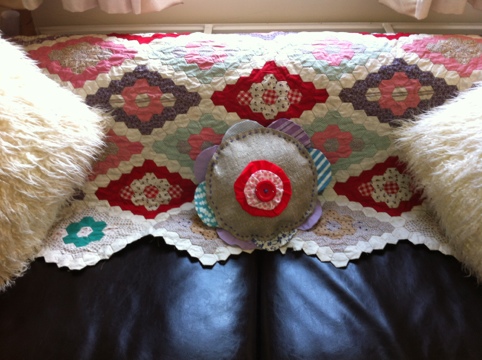
Once you have your yoyo’s you need your central motif. I used an old partially completed traycloth I picked up in the charity shop a while ago for pennies. I played a bit with the placing and with buttons. Well, you know me. And came up with my design…

Then I used a tea plate to draw my circles, avoiding the manky stain…lovely linen fabric but definately dingy in parts hence my eagerness to chop!

I then used some more yoyos to add some zing to the back and foound some hessian-like linen for the back. I used a dinner plate to cut two larger circles of that.

Then i used tapestry wool to sew the yoyo’s onto the central circle of fabric and the larger background circle together – I am lazy so I like to only use one set of stitching if possible. That did the front.

I sewed the red yoyo onto the back and then stitched the front and back together using running stitch and tapestry wool again, leaving the edges raw – rustic all the way, me. I stuffed it with toy stuffing and continued to stitch all the way round, closing it up. The rough linen can take this unfinished look I think.

I’ve put it with my vintage Grandmothers Garden quilt top,a flower for the garden!
Hope you like it…why not have a gogo with yoyo’s (groan)!

Leave a comment